Sourdough Recipes with Starter: Your Guide to Baking
Table of Contents
Sourdough Recipes with Starter: Your Guide to Baking
There’s something magical about transforming flour, water, and patience into a loaf that fills your kitchen with warmth. I remember my first attempt—a dense, lopsided brick that somehow still tasted like victory. That’s the beauty of working with fermented dough: every imperfection tells a story, and every bake connects you to generations of home bakers.

Creating your own homemade sourdough bread isn’t just about following steps. It’s about embracing a slower rhythm in a fast-paced world. You control the ingredients, skip the preservatives, and craft something nourishing. Plus, that tangy flavor? It’s unmatched by store-bought loaves.
When I began, I worried about “messing up.” But over time, I learned to trust the process—the way a bubbly starter responds to care, or how dough transforms with practice. This guide will walk you through techniques I wish I’d known earlier, from shaping to baking. You’ll also find tips for troubleshooting common issues, like overproofing or sticky dough.
Introduction to Sourdough Baking
Imagine capturing wild yeast from your kitchen air to create bread that’s alive with flavor. This ancient method uses natural fermentation instead of store-bought packets, turning simple ingredients into something extraordinary. Unlike commercial loaves, every step here connects you to a timeless tradition.
Embracing the Sourdough Journey
Working with fermented dough teaches patience. Your starter becomes a living companion—it needs regular feedings of flour and water, responds to room temperature, and rewards care with bubbly activity. Over days, natural microbes break down gluten and phytic acid, making nutrients easier to absorb.
Beginners often worry about timing or texture. But as one baker notes, “Your first loaf isn’t a final product—it’s the start of a relationship.” Mistakes become lessons, and each bake deepens your understanding.
Why Sourdough Is Worth Your Time
Commercial yeast speeds up rising but skips flavor development. Wild fermentation creates complex tanginess while predigesting starches. This means easier digestion and fewer blood sugar spikes compared to regular bread.
Quality matters: unbleached flour and filtered water keep your culture thriving. Though the process takes hours, most is hands-off. You’ll gain bread that stays fresh longer and a skill that connects kitchens across centuries.
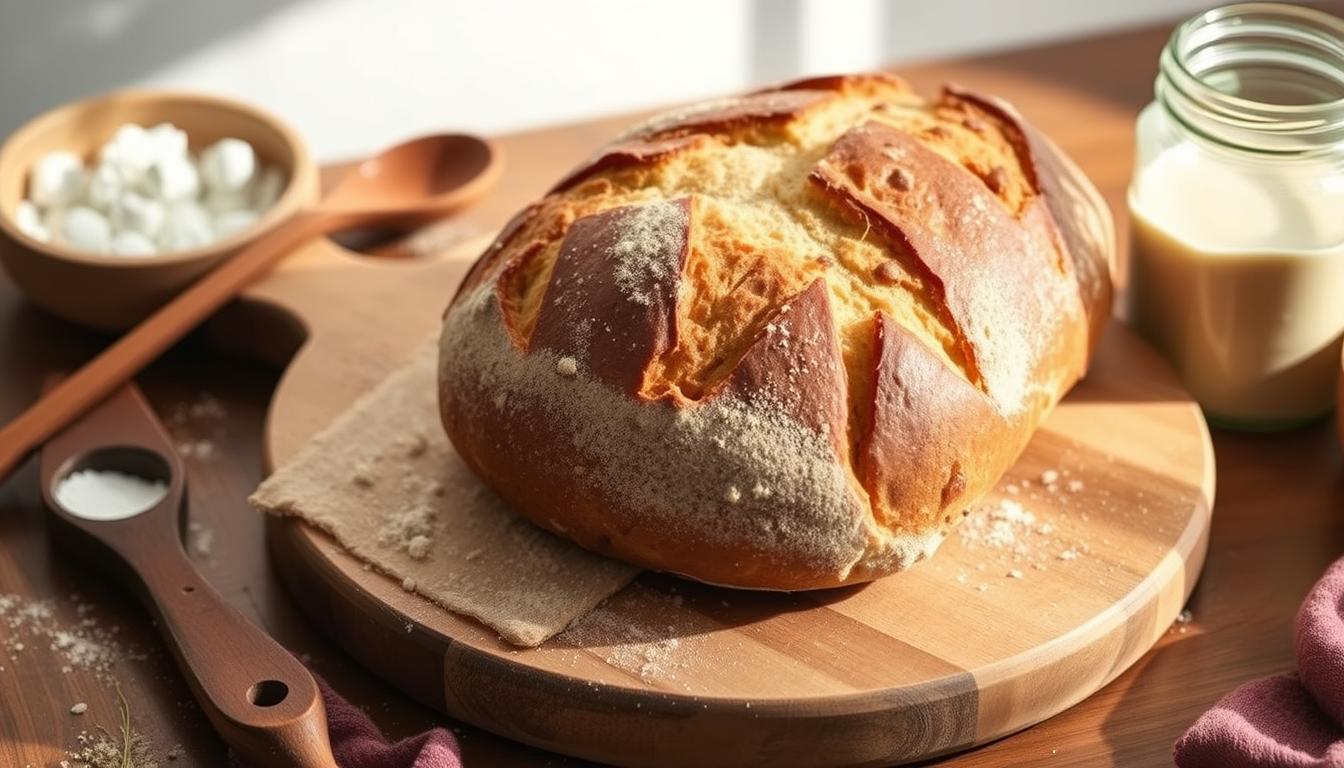
What is Sourdough Bread?
Every slice of sourdough bread is a testament to ancient culinary traditions, relying on nature’s own leavening agents. Unlike commercial yeast breads, it uses a fermented mixture of flour and water called a starter. This living culture captures wild yeast and bacteria from the environment, creating natural bubbles that lift the dough over hours—not minutes.
The slow fermentation process breaks down starches and gluten, boosting digestibility. “It’s like pre-digested bread,” explains artisan baker Elena Lopez. Nutrients like B vitamins become more accessible, while lactic acid gives the loaf its signature tang. Compare this to quick-rise recipes, which skip these flavor-enhancing steps.
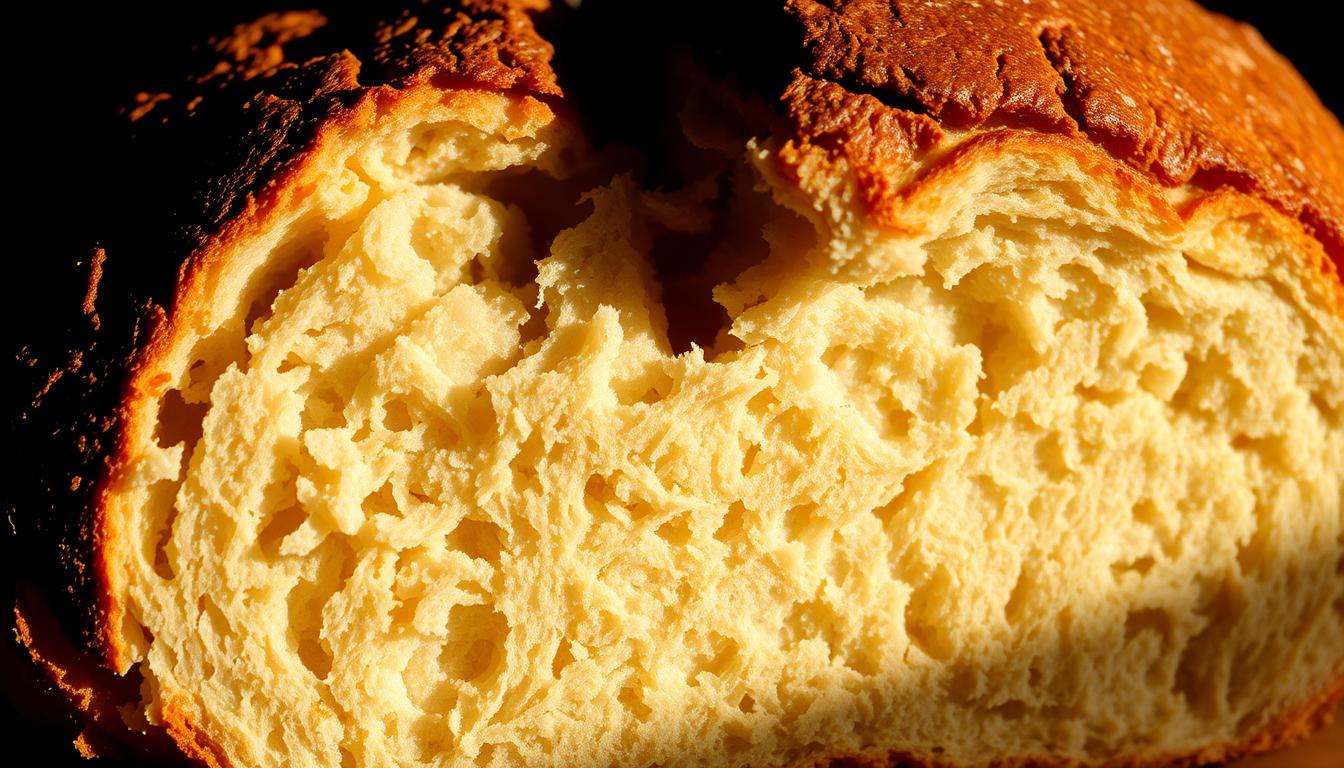
Texture tells the story, too. Properly fermented dough develops a chewy crumb and crispy crust—hallmarks you won’t find in mass-produced loaves. Bakers have perfected this method for over 5,000 years, from Egyptian grain stores to Gold Rush-era San Francisco. Today, it remains a symbol of craftsmanship in a world of shortcuts.
Whether you’re exploring gluten-free options or seeking richer flavors, this method adapts. It’s not just a bread recipe; it’s a bridge between modern kitchens and ancestral techniques. The result? A loaf that nourishes both body and tradition.
Understanding Your Sourdough Starter
Your sourdough journey begins with a vibrant, bubbling mixture that’s more than just flour and water. This living culture—a blend of wild yeast and bacteria—serves as your bread’s natural leavening agent. Unlike commercial yeast, it works slowly to develop complex flavors and improve digestibility.
Creating and Feeding Your Starter
Mix equal parts flour and water in a clean jar. Over 5-7 days, daily feedings help beneficial microbes thrive. Discard half the mixture before each feeding to prevent overcrowding and maintain acidity. “A hungry starter is an active one,” says baker Marco Torres. Regular feedings keep your culture strong and ready for baking.
Identifying an Active Starter
Look for these signs of a healthy culture:
- Bubbles covering the surface and sides
- Doubling in size within 4-6 hours after feeding
- A tangy, yogurt-like aroma
Test activity with the float method: drop a spoonful into water. If it floats, gases have built up sufficiently to lift dough. Maintain peak performance by feeding at consistent times and storing at room temperature. For long-term storage, refrigerate and refresh weekly.
Ingredients and Equipment Essentials
The foundation of great bread lies in the harmony of simple ingredients and reliable tools. Without quality components and precise measurements, even the most skilled hands face challenges. Let’s break down what truly matters in your kitchen setup.
Kitchen Tools You Can’t Live Without
Start with high-protein flour—it builds the gluten structure needed for airy crumb. Pair it with filtered water and fine sea salt. “Salt isn’t just for flavor—it regulates fermentation,” notes baker Claire Martinez. Avoid iodized varieties, which can hinder microbial activity.
Your toolkit should prioritize accuracy. A digital scale ensures consistent ratios, while a sturdy mixing bowl handles vigorous folds. The Dutch oven traps steam during baking, mimicking professional deck ovens. This creates that coveted crispy crust and even rise.
Optional upgrades include a banneton basket for artisanal shaping and a dough scraper for clean handling. For best results, use your fridge to slow fermentation overnight. Preheat your oven 30 minutes longer than usual—this ensures stable heat for spring.
Remember: Great bread rewards patience and preparation. With these essentials, you’ll turn everyday ingredients into extraordinary loaves.
Simplifying the Sourdough Process
Great bread starts with three simple phases that transform sticky flour into airy perfection. By breaking the journey into clear steps, you’ll build confidence while letting science do the heavy lifting.
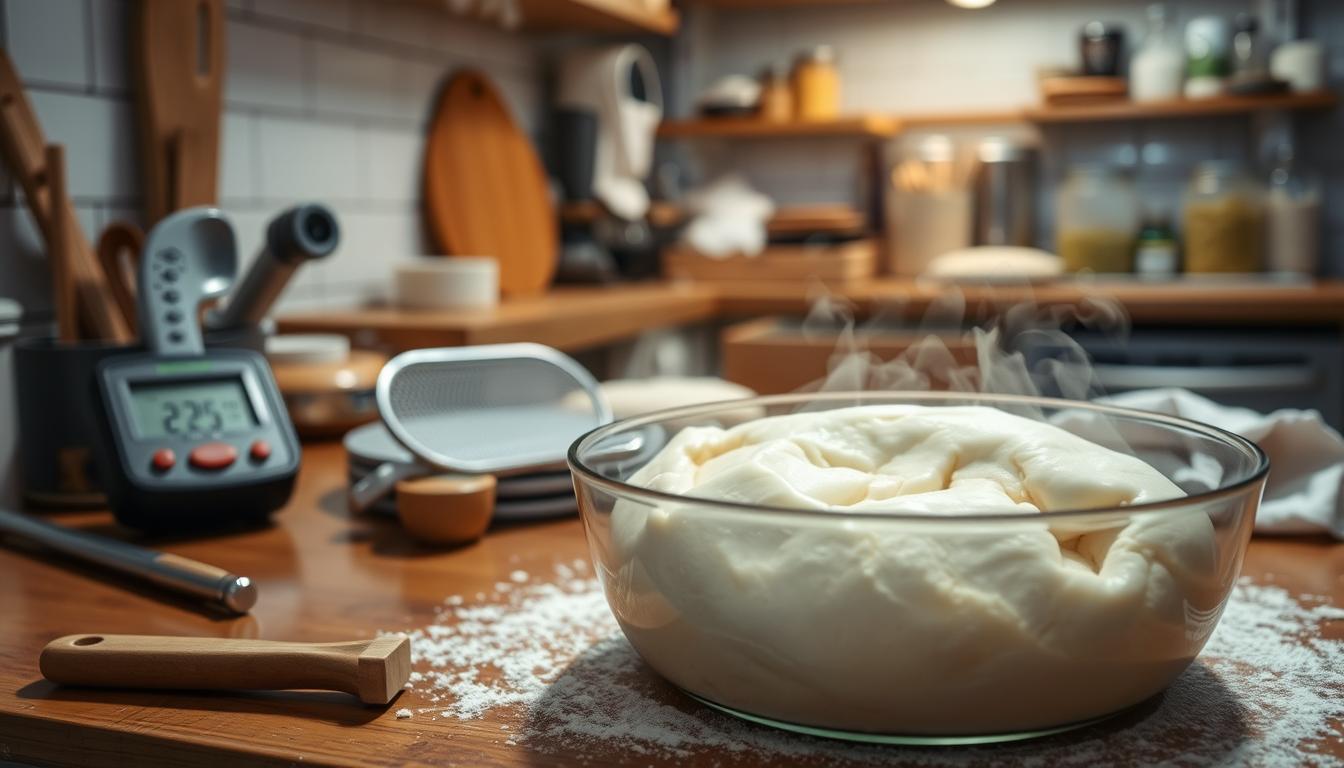
Mixing, Autolyse, and Fermentation Basics
Begin by combining flour and water—no starter yet. This autolyse phase (30-60 minutes) hydrates the dough and jumpstarts gluten development. As baker Jamie Wu explains, “It’s like giving flour a head start before the real work begins.”
Add your active culture and salt next. Mix until just combined—overworking can tear delicate gluten strands. Now begins bulk fermentation, where wild yeast multiplies. Keep temperatures between 70-75°F for steady rising. Warmer rooms speed things up; cooler spaces demand patience.
Mastering the Stretch and Fold Technique
Replace kneading with this gentle method. Every 30 minutes during bulk fermentation, wet your hands and pull the dough upward, folding it over itself. Four rounds create structure without exhausting the yeast.
Watch for these signs your process is working:
- Surface becomes smooth and slightly domed
- Dough holds finger indentations briefly before bouncing back
- Visible bubbles form beneath the crust
Timing varies, but most dough needs 4-6 hours total. Use clear containers to track growth. When doubled, shape your loaf and let it rest overnight. This final step deepens flavor while simplifying your schedule.
sourdough recipes with starter
That jar of bubbly culture on your counter isn’t just for loaves—it’s a passport to a world of flavor. Once you’ve learned to make sourdough starter, a universe of baked goods opens up. Think golden-brown pizza crusts with charred edges, chewy bagels dotted with sesame seeds, or tender muffins flecked with berries.
Beginner-friendly options prove simplicity works wonders. Overnight pancakes require just four ingredients: mix your active culture with flour, water, and salt before bed. By morning, you’ll have batter ready for the griddle. “The best part? No kneading, no fuss,” says home baker Leah Nguyen.
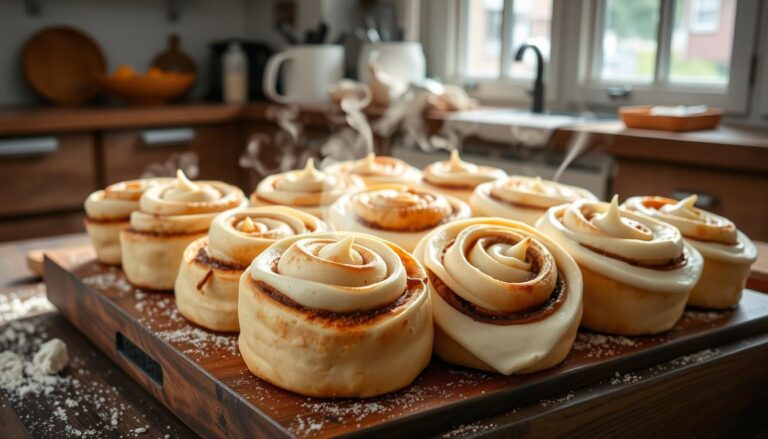
Your discard isn’t waste—it’s opportunity. Blend it into crackers seasoned with rosemary, or fold it into waffle batter for tangy depth. Even classic sourdough bread recipes adapt: add roasted garlic to the dough or swirl in cinnamon sugar for a breakfast twist.
Experimentation thrives on routine. Feed your starter consistently, and soon you’ll make sourdough pretzels or focaccia without second-guessing measurements. The magic lies in ratios: adjust hydration for crispier crusts or softer interiors. Every bake teaches something new—and tastes like triumph.
Step-by-Step Guide for the Beginner’s Loaf
Crafting your first loaf is a dance between precision and patience—where each step builds toward that perfect slice. Let’s walk through the process from mixing bowl to golden crust, focusing on techniques that ensure success.
Prepping Your Dough and Bulk Fermentation
- Mix ingredients: Combine 500g flour, 350g water, 100g active culture, and 10g salt. Stir until no dry patches remain.
- Autolyse rest: Let the dough sit covered for 30 minutes. This hydrates the flour and kickstarts gluten formation.
- Bulk fermentation: Over 4-6 hours at 70°F, perform 4-6 stretch-and-fold sessions every 30 minutes. Watch for a 50% size increase.
Resting periods are crucial. They allow gluten networks to strengthen and gases to distribute evenly. Skipping these pauses often leads to a dense crumb.
| Rest Time | Crumb Texture | Flavor Development |
|---|---|---|
| 30 min | Moderate holes | Mild tang |
| 2 hours | Open structure | Balanced acidity |
| 4+ hours | Irregular pockets | Deep complexity |
Preheat your Dutch oven at 450°F for 45 minutes. Bake the loaf covered for 20 minutes, then uncovered for 25. Steam trapped inside creates a crisp crust while encouraging oven spring.
For an airy interior, avoid overhandling during shaping. Use floured hands and work quickly to preserve gas bubbles. Let the shaped dough proof at room temp for 1-2 hours before baking.
Creative Twists on Traditional Sourdough
Your bubbling jar holds endless possibilities—not just bread. By reimagining how you use fermented dough, everyday bakes become extraordinary. Let’s explore how small tweaks can transform familiar favorites into crowd-pleasing creations.
Flavor Additions and Recipe Variations
Think beyond the basic loaf. Fold roasted garlic and rosemary into dough for an aromatic sandwich-ready bread. Mix citrus zest into discard muffin batter for bright morning treats. Even a handful of chocolate chips can turn pancake batter into dessert.
Ingredients impact both flavor and texture:
- Whole wheat flour adds nuttiness and chew
- Honey softens crumb in sweet doughs
- Olive oil creates tender pizza crusts
Try this simple recipe twist: blend discard with mashed banana and oats for waffles. The natural tang balances sweetness while boosting rise. For savory options, mix in shredded cheese and jalapeños before baking focaccia.
Experimentation thrives within boundaries. Maintain core ratios of flour to liquid when modifying recipes. Track changes in a journal—what works becomes your signature bake. As one innovator notes, “My best cinnamon-raisin loaf came from a happy accident.”
Remember: even classic dough adapts. Use discard to make airy crumpets or flaky croissants. The same starter that lifts bread can leaven doughnuts when paired with baking soda. Your kitchen becomes a lab—and every test tastes like progress.
Nailing the Perfect Crust and Crumb
The crackle of a perfectly baked crust tells you everything’s gone right. That golden-brown exterior and airy interior aren’t accidents—they’re science in action. Master three key elements: heat, steam, and timing.
Secrets to a Crispy Crust
Preheat your oven 45 minutes before baking. Use a Dutch oven or steam pan to trap moisture. This softens the dough’s surface, letting it expand fully before hardening. “Steam is non-negotiable,” says pro baker Rachel Kim. “It’s the difference between leather and lace.”
Score your dough with a razor blade at a 30-degree angle. Shallow cuts tear; deep ones collapse. Aim for ¼-inch depth. Patterns matter: a single slash encourages even rise, while decorative designs control expansion direction.
If your crust turns pale, increase baking time by 5-10 minutes. Dense crumb? Check fermentation—underproofed dough lacks gas bubbles. For consistent results, track these variables:
- Oven temperature accuracy (use an external thermometer)
- Steam duration (first 20 minutes of baking)
- Cooling time (wait 2 hours before slicing)
| Issue | Fix | Outcome |
|---|---|---|
| Burnt crust | Lower heat by 25°F | Even browning |
| Gummy crumb | Extend bake time | Light texture |
| Flat loaf | Boost steam | Better spring |
Adjustments refine results. Cool loaves on a wire rack to prevent sogginess. Remember: patience rewards you with that satisfying crunch and honeycomb crumb.
Troubleshooting Common Sourdough Pitfalls
Even seasoned bakers encounter hurdles when working with fermented dough. Understanding why issues arise during bulk fermentation helps you course-correct before dough becomes unmanageable. Let’s tackle two frequent problems and their solutions.
Over-Fermentation and Sticky Dough Fixes
Dough that’s too sticky or smells alcoholic has likely over-fermented. This happens when wild yeast consumes all available sugars, weakening gluten structure. To rescue it:
- Reduce bulk fermentation time by 1-2 hours next batch
- Knead in 1 tbsp flour to absorb excess water
- Shape immediately and refrigerate overnight
If dough collapses when poked, it’s past saving for bread—but makes excellent crackers or pizza base.
Adjusting Hydration and Texture
Too much water creates slack dough; too little yields dense results. Test hydration by pressing dough—it should slowly fill indentations. Adjust gradually:
- Add flour 1 tbsp at a time if sticky
- Mix in water 1 tsp at a time if crumbly
Check progress every 30 minutes during bulk fermentation. Warmer kitchens may need shorter rise time—aim for 50% volume increase within 4-6 hours.
Remember: Dough behavior changes with seasons. Track room temperature and adjust hour-by-hour for consistent results.
Baking Techniques: Dutch Oven and Other Methods
Your oven becomes an artist’s studio when baking artisanal bread. The right tools transform heat and steam into golden masterpieces. Among these, the Dutch oven reigns supreme for creating professional-quality loaves at home.
Enhancing Oven Spring and Browning
A preheated Dutch oven mimics commercial steam-injected ovens. Its heavy lid traps moisture, letting dough expand fully before forming a crust. “That initial burst of steam is like hitting the ‘rise’ button,” explains baker Tessa Nguyen.
Follow this method for success:
- Preheat your oven to 450°F with the empty pot inside for 45 minutes
- Line a bowl with parchment paper, then place shaped dough inside
- Carefully place Dutch oven lid on top to capture steam during baking
Alternative methods like baking stones lack built-in steam control. Without a Dutch oven, use a metal pan with ice cubes below your bread. But expect less consistent browning.
Keep heat steady by avoiding frequent door openings. Check doneness with an internal thermometer—210°F signals perfection. Let loaves cool on a rack to preserve crispness.
Long Fermentation and Proofing Insights
Time becomes your secret ingredient when working with fermented dough. Unlike quick-rise methods, extended proofing unlocks deeper flavors and textures. This slow approach lets natural enzymes break down starches while acids develop complexity.
Why Cold Proofing Transforms Texture
Using your fridge during the final rise does more than fit your schedule. Chilling dough at 38-42°F slows yeast activity, letting bacteria produce lactic acid. This creates a lighter crumb with irregular air pockets—the hallmark of artisanal bread.
Cold environments also make dough easier to handle. Gluten relaxes gradually, reducing tearing during shaping. “A 24-hour refrigerator rest gives my loaves their signature tang,” shares baker Lena Choi. Most doughs thrive with 12-72 hours of cold proofing, depending on desired sourness.
Follow these guidelines for best results:
- Shape dough before refrigerating to maintain structure
- Cover tightly to prevent drying
- Let dough warm 30 minutes before baking
Patience rewards you here. Extended time in the refrigerator allows flavors to mature while simplifying timing. Your dough waits quietly until you’re ready—no frantic oven preheating required.
Conclusion
Mastering fermented dough transforms your kitchen into a lab of flavor and texture. From nurturing your bubbly culture to shaping golden loaves, each step connects you to centuries of baking wisdom. Natural fermentation isn’t just about tangy flavor—it’s a gateway to digestible, nutrient-rich bread that commercial yeast can’t match.
Remember the essentials: feed your starter consistently, control bulk fermentation times, and harness steam in a Dutch oven. Adjust hydration and temperature like a pro—sticky dough becomes crackers, while underproofed batches make rustic pizza bases. Your first lopsided loaf? It’s progress, not failure.
Now’s the time to experiment. Swap 20% of flour for rye in your next bread recipe, or fold roasted garlic into weekend dough. Share your crusty triumphs online—every cracked ear inspires fellow bakers. As one enthusiast says, “The best loaves blend science with soul.” Keep refining, and soon your oven will hum with edible art.
FAQ
How do I know if my starter is active enough for baking?
An active starter will double in size within 4–6 hours after feeding, with bubbles on the surface and a slightly sweet aroma. If it passes the float test (a small piece floats in water), it’s ready to use.
Can I use all-purpose flour instead of bread flour?
Yes! All-purpose flour works well, but bread flour’s higher protein content creates a chewier crumb. For a lighter texture, mix 50% all-purpose and 50% whole-grain flour like King Arthur’s organic options.
Why is my dough too sticky during shaping?
High hydration or warm temperatures can cause stickiness. Dust your hands and work surface with rice flour, and use a bench scraper to handle the dough gently. Let it rest 10–15 minutes before reshaping.
Do I need a Dutch oven for baking?
A Dutch oven traps steam, creating a crispy crust. If you don’t have one, place a pan of boiling water on the oven’s lower rack and bake on a preheated pizza stone or baking sheet.
How can I fix over-fermented dough?
Over-fermented dough may collapse or taste overly sour. Refresh it by folding in 10–20% fresh flour and water, then reshape. Reduce bulk fermentation time next bake.
What’s the benefit of cold proofing?
Cold proofing in the fridge (12–48 hours) deepens flavor, improves texture, and makes scoring easier. It also allows flexible baking times—bake straight from the refrigerator.
Can I add flavors like herbs or cheese to the dough?
Absolutely! Mix in ingredients like rosemary, garlic, or shredded cheddar during the stretch-and-fold phase. Avoid adding more than 1 cup of extras to prevent weighing down the loaf.
How do I store discard?
Keep discard in a sealed container in the fridge for up to 2 weeks. Use it in pancakes, crackers, or waffles. For long-term storage, dry it into flakes or freeze portions.